When it comet to rigging there are various was to approach it, you may be following a tutorial, making something of your own or even something never tried before with a milling different connections and mel scripts. The one think to keep in mind thought it is it relevant...
What I mean by this is if your animation is only going to be about 30 seconds and the camera is mainly looking at there face then those 15 hours adding IK/FK to every finger toe might seem a bit wasted. Also think about if you're likely to be using this character again soon as spending 15 adding a good foot role will be easier than trying to add it later when you have to dig up all the hidden nodes and controls.
Then the most important part to remember is naming conventions. Not only will it make your rig look neat and tidy, it will safe a heck of a lot of time. For example if you name every joint that is going to be used to bind to the skin, if you use a prefix of something like bn (short for bind), when it comes to skinning you can simply use maya's search tool to select all objects with a prefix of bn. That might seem small but if your making quite a complex character being able to search and select a large group of similar objects is essential.
Another naming convention to keep in mind is where it is on the rig, if its joints for the leg, name them with the correct term like knee of ankle, this is also essential if the rig is intended to be used by someone else. Other good practices are using _l_ or _r_ for left and right, this way if your rig is symmetrical, you can make some side and quickly mirror it across making maya change the _l_ to _r_ and save yourself from any tedious renaming.
Whilst making/rigging my character for "what am i" there are a lot of muscles involved, so everything that's involved in the muscle system was given a prefix of mus. Also any joint that are used to bind to the face were given a prefix of bn_face, this way i can quickly select binding joints of a specific area of the rig. Then always remember to add a number at the end (e.g. bn_l_wrist01) as later down the line you may need to add a similar joint and there will be a naming clash, this was essential for me as when i made the muscle i decided half way through that id add some more, so i was able to use the same naming convention and just change the 01 at the end to 02.
Tuesday, 28 September 2010
Saturday, 25 September 2010
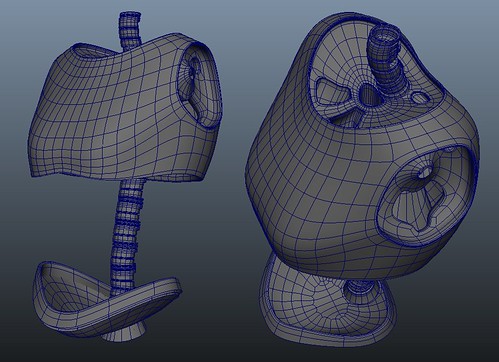
Barry - WIP - 07
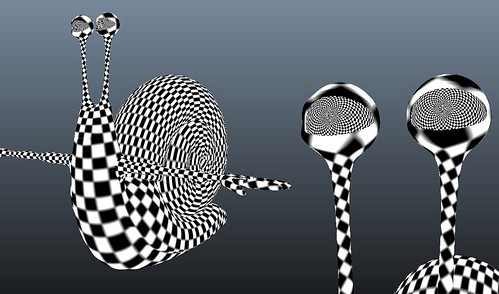
All hail the Hypnosnail... I've set out the UV's for the snail so I can start on some textures. The whole main body is one mesh so I've made the seam along the back where most of it is covered by his shell. When rendering I will be smoothing the mesh so its best to set out the UV's now where there's not so much resolution to deal with. Another tip is if you're working on a large scene and you're setting the uvs of multiple objects instead of assigning a checker texture and then re-assigning there shaders after make a render layer with the surface shader as an override, this way you can set the uv's with everything using the surface shader, then when you're done delete the render layer to get back to normal with there own shares still assigned.
Friday, 24 September 2010
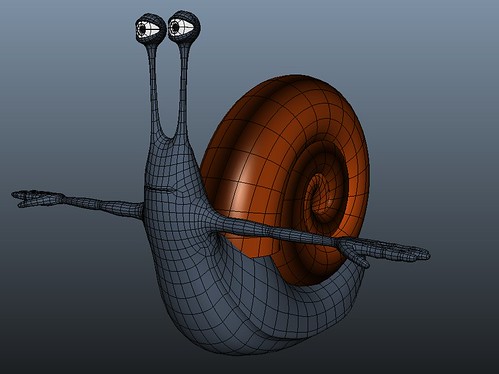
Barry - WIP - 06
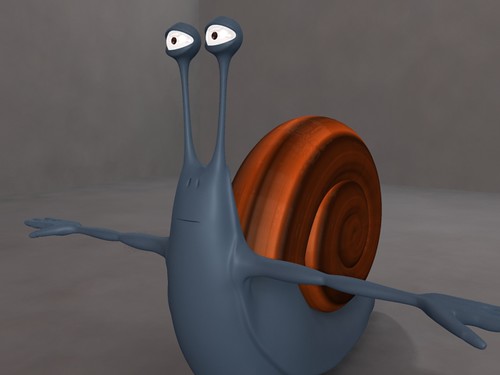
Made some more adjustments to the mouth and redo the topology for the upper body for better deformation when it comes to animating. To start off with the chest and arms were connected like a grid which looks good, but doesn't deform well as there would be a lot of twisting so i re directed the edges so it loops around the elbow joint. Ive also added a few procedural textures for the shell and added some small nostrils :D
Thursday, 23 September 2010
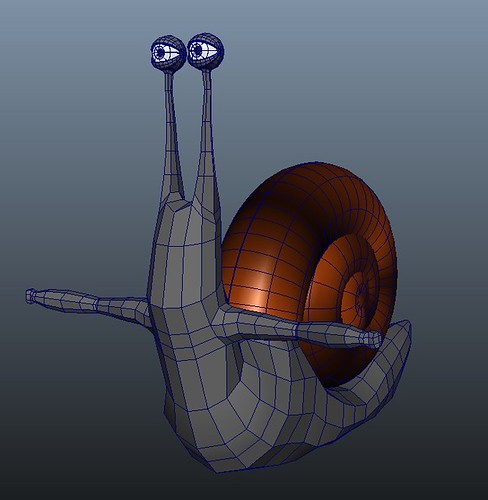
Barry - WIP - 05
Here I've added some volume to his arms and rotated the hands so there in the correct position for rigging. I've also started making his mouth. From looking at cartoon mouth references it seems the majority don't have much detail and keep a simple smooth edge so I've decided to try go for this look.
Barry - WIP - 03
I made the hands by starting with a cylinder then attaching it to he body and with a fed tweaks to give a hint of some muscles.
Barry - WIP - 01

The start of a new Character "Barry the snail". Started off be extruding along a spiral curve to get the shell and a cylinder for the body.
Tuesday, 21 September 2010
In Bruges - Lollipop Man
Still thinking of some ideas for my facial animation. Another idea I might do is this scene from "in Bruges" (from where he says "in my book though"). However instead of having normal characters I will be doing two slugs sat on a rock, maybe use some live footage filmed at uni for the background with some help from Match mover.
Old projects cannibalised by mutants
Do not delete it!!! In my experience whilst learning 3D animation you start off with all these great ideas and go off to start making you masterpiece :)... then a few hours later you realise you're not at the current level to finish it off and it gets covered by new more interesting projects and sooner or later it finds a cold dark corner on you're hard drive. Well the best thing to do is keep some of them as later on you may decide to re-open that story or something similar. For example: once upon a time I decided to make a street, and with visions of pavements, shop windows and blue clear sky's... then 6 hours later I was stuck (sad face), I had some building in place, a few detailed props but... not a clue how to use the UV texture editor or shader's and like "Raiders of the lost ark" it was stored away to be looked at by top men.
All hope seemed lost for the neglected street scene with its simple UV's and un-clean topology. However when I started my individual project I thought to myself, wouldn't it be good to have some sort of street scene to start off with, something that wouldn't take too long to make (as its not a main part of the story). Then suddenly that old neglected scene file was lifted from the depth of removable HDD hell, given hope and injected with the power of Maya 2001 from Maya 6. Then with a few minor improvements I was able to cannibalise this old withered husk of a street scene and strategically save 2 hours :)
This may seem pointless as 2 hours isn't that significant when spending months on a project however recycling several props and keeping a small library of primitive objects can end up saving you a ton of precious time on tight deadline projects. This might seem like cheating and avoiding learning new things but after you've made 5 different ears there's not much you will learn from making a 6th. Keeping a primitive ear you can easily incorporate into you're next new character and modify will give you more time to spend elsewhere making something new or better.
So next time you make something that doesn't work out, think how it can be used in other projects, and when making several characters, instead of making 6 head from scratch, make 1 low-res simple head and re-use it for other characters and projects.
Outside the box can lead to another box :D
One thing you will always hear when approaching a problem or something creative is "Think outside the box" so when I started my facial animation class I thought of all the different clips of dialogue I could do and how I could stylise a character so its just not a normal head doing the talking. Whilst also doing this project I'm still thinking over old ideas and possible projects in the future and one of them is with a snail character but I can never get the time to start while doing current projects, so... why not do them both.
So I've decided to look into doing a clip with cartoon snails as the characters so that at the end I will have the character finished and rigged for another project. Ill also be able to explore ideas like how can I portray human facial expressions and body language onto a different forum as this will be good practice as the majority of animated films have at-least one or more non-human character.
Also the most important thing to remember is to try new things and expand you're skills, if you've rigged a face before, try rigging a face that's completely different, if you've animated a character, animate a character with a different personality. It's very easy to get stuck in a rut making similar characters, making similar rigs and using that same personality when animating, still coming out with a good piece of animation but not learning as much as you could and making something better the next time.
Wednesday, 15 September 2010
Hey Paul!!!
Hey Paul!!!, originally uploaded by James D Thompson.
This is the scene I will be using and trying to recreate for my facial animation class. I chose this because there's a lot of non verbal communication with his hands that help emphasise his dialogue and actions :)
Hey Paul! - WIP - 01
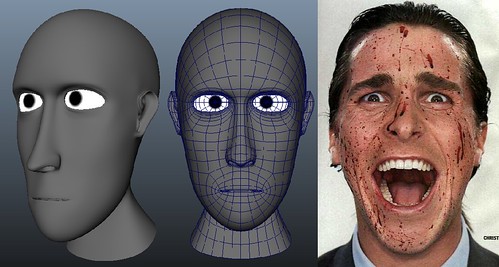
Starting to make a head for my facial animation. I've decided to do a clip form "American Psycho" as not only is there some good dialogue but also some fun mad expressions :D. The head above isn't supposed to look like Christian as im making a full simple character and rig to do a few animations with. So far I've got most on the topology how i want so now i cam make some major changes easily.
Monday, 13 September 2010
What am i - WIP - 34
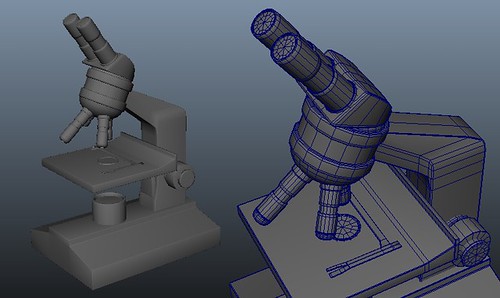
Starting making and updating detailed props to populate the scene. I made this microscope for my last animation but it was just made up of polygon primitives and simple shaders with no textures. Here I have cleaned up the old model and set up all the uv's in one tile so i can save on texture space and only use one shader. As this prop is quite small and never seen close up ive reduced the overall resolution to reduce on render time.
Monday, 6 September 2010
What am i - WIP - 33

i decided to add a bit more detail to one of the walls by replacing it with some breeze blocks that have been damaged. as i start to tweak the lighting a bit more ill be making it darker but with some added light seeping through the broken wall to add more space to the scene like theres something on the other side. Also im not too sure about the scale as they seem a bit too big. When im more happy ill brake a few blocks on the wall and add some rubble on the floor to give a greater strength of decay.
Thursday, 2 September 2010
What am i - WIP - 32
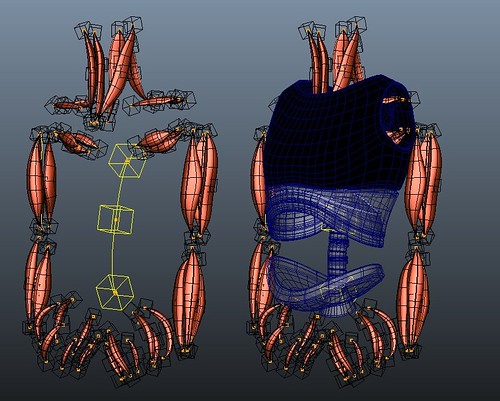
Body building my muscles :D. this is a shot so far of the muscles for the upper body. These muscles will be used for rigging and rendering so they have to fit well with the rest of the robots mesh. At the moment i'm undecided but i can either use the muscle skinning tools to give realistic skinning for the muscles against the mesh or use normal smooth skin and just add the nurbs muscle as influences. I have also use a muscle for the spine mesh which gives good deformation with little effort. The next step will be to set the "stretch", "rest" and "squash" states of all the muscles.
What am i - WIP - 31
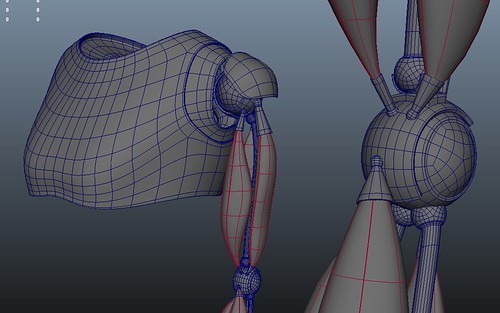
Here ive made the muscles for the arm's, ive tried to model close to the real thing as there not just rigging muscles they will be rendered as well. For the elbow joint instead of having one joint to rotate around ive made one main and a 2nd smaller joint. this way there is a small offset which helps rotate the muscles more and get better displacement with the muscles.
What am i - WIP - 30
Ive started to make more complex things like the main spine to bring the main part of the body together. For the robots mesh, i molded most of it to get a good low-res base, then ive started to add more detail as ive got a better idea where all the pieces fit together.
Subscribe to:
Posts (Atom)