38 min render down to 3 min, now where getting somewhere :D
The previous render i had that took 38 min was HD but had the lowest setting, now, the same setting give me the same render but only at 3 min :D.
The frame above is the same 3min render with an added FG and Anti-alias which brings it to 17min so final gather is adding quite a bit on there; might give some GI a try instead :P
Monday, 28 February 2011
What am i - WIP - 60
Sunday, 27 February 2011
What am i - WIP - 59
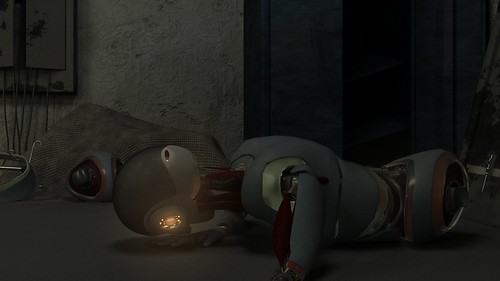
A little less quality in the render. This is just 640x480 with no FG, GI or anti-aliasing and it took 2:25 min to render so i might be able to hand in something like this with still HD shots of each scene :)
What am i - WIP - 58
So far so good, apart from rendering :S.
This shot took 38 min to render :S so I don't think ill be rendering it like this. Ill try cut the render time down in a few days after the animation is done as id rather have some good animation at a lower render quality.
I think for the deadline (4 days) i will have the animation done and a medium render put together and a few more high quality still to show what its actually like. Then after ill render it out in 1080HD, hopefully before the presentation :)
It seems a bit silly to me that this and the showreel have the same deadline as everyone is worrying about there animation with the showreel on to, also there are other projects still on going which cannot get included in the showreel as there not finished yet so it would make more sense to have the showreel at the end of university so you don't have to re-make it.
Friday, 25 February 2011
What am i - WIP - 57
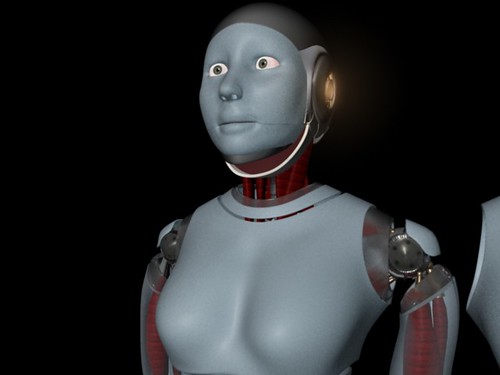
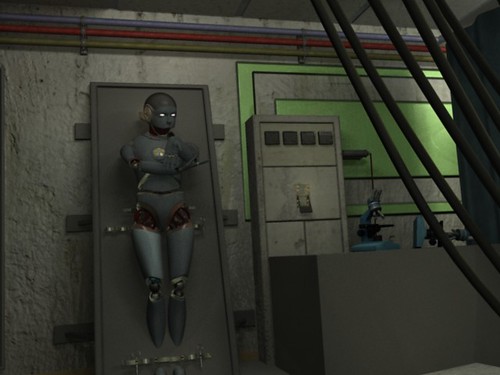
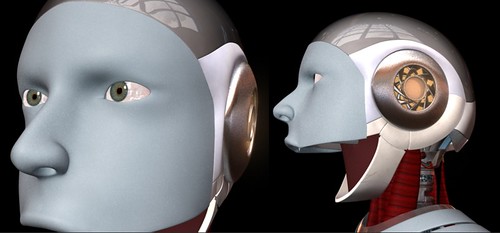
Making the female robot...
So far it will need a lot more work XD
Im not re-making an entire character as i wouldn't be able to finish in time and there not much animation and screen exposure of the female robot so there no point in making an entirely new character. Ive changed the face and chest which is set up as blend-shapes so you can morph from one character to the next.
blocking
blocking, originally uploaded by James D Thompson.
This is a play blast from a week age showing the blocking out of the animation :)
Thursday, 24 February 2011
What am i - WIP - 56

Attack of the multiple robotic muscle dislocation :D
Dont worry nothing is wrong here, just thought id post it as it looked funny. This happens because the muscles are dynamic, so they deform based on momentum and when blocking i had some key frames set to stepped, so snapping from one position to the next makes the explode :D. they work fine after you add some interpolation between the poses :P.
What am i - WIP - Cloth Test
What am i - WIP - Cloth Test, originally uploaded by James D Thompson.
Here im just testing out ncloth to see if its worth using. In my animation the robot grabs hold of the cloth and pulls it off the table so here im replicating what's going to happen to see if i can do it :).
The cloth starts in its rest state, then a constraint pulls it across (the robots hand pulling it), then towards the end it's keyed to stop being dynamic so that when its off screen it doesn't need to be evaluated any more. Also to speed thing up, after im happy with the cloth ill Cash the data so it doesn't need to solve the cloth each time i scrub the time line.
What am i - WIP - 55
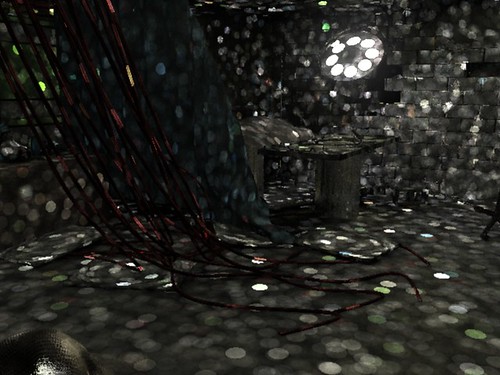
Global illumination = 1970 funky disco :D.
Just changing the setting of the global illumination to try reduce render time. Here iv set the accuracy to 0 which ruins the render but allows me to visually diagnose where the photons are going. Keeping the GI accuracy up makes it look better but harder to see what needs changing so ill bump it up when im happy with the rest of the attributes :).
Im also quite tempted to leave it like this and see people reactions when they see it :D
What am i - WIP - 54
Just keep testing the rendering of the two scene merged together through referencing :).
Wednesday, 23 February 2011
Warning - Do not trust this site below
Well it doesn't get more obvious than the title above the link below is a fraud trying to rip people off for free software. The website claims to be selling amazing animation software but its nothing more than a version of blender which is a free software. The screen shots on the website have been copied from blenders website so the whole this isn't to be trusted.
http://computeranimations.org/
http://computeranimations.org/
Tuesday, 22 February 2011
What am i - WIP - 53
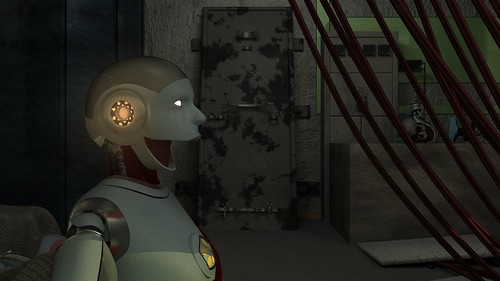
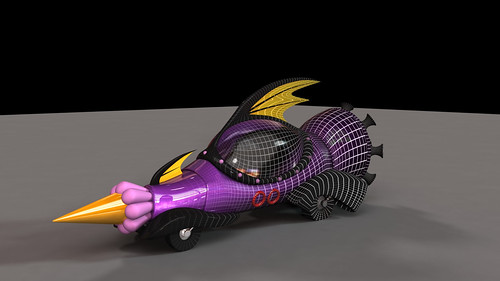
This is more or less what the final rendering of the male robot is going to look like. In this render though he looks quite bland as there's no lighting and its just using final gather so when he's rendered in the finished scene it should add a lot more detail :)
What am i - WIP - 52
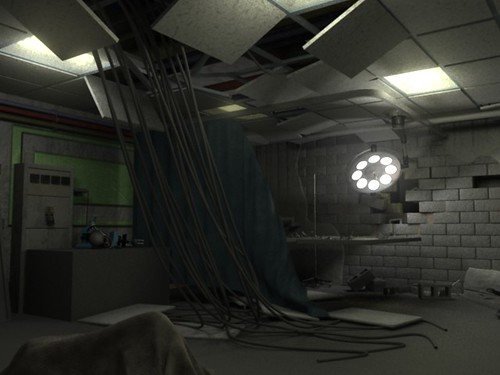
This is the final look for the room, a few more textures to change (mainly the green part of the wall to the left) but im happy with the rest and the lighting so ill be signing this part of very soon :)
Another reason to use Digital tutors
If you ever did need another reason to use digital tutors here's a prime example. I was having trouble scaling some muscles with my rig so I posted a question on there help forum to see if anyone knew. At first I was just expecting no one to answer or at best a small comment or link to something but not too long after posting, one of the DT staff actually went out of his way to create a small video tutorial on how to do it. Its this quality of service that relay distinguishes digital tutors from other tutoring services.
Ask DT - scaling maya muscles? from Digital-Tutors on Vimeo.
Ask DT - scaling maya muscles? from Digital-Tutors on Vimeo.
Saturday, 19 February 2011
What am i - WIP - 51

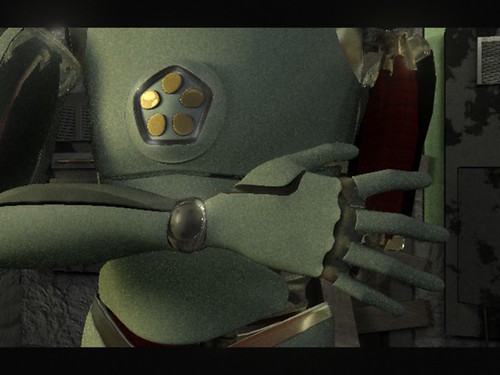
Using dynamics is helpful even if its not used in the correct way. Here i needed to attach this power unit to the robots chest, however I didn't want it to deform so i couldn't skin it the same way i did the chest. Also couldn't just parent it out use geometry constraints as it wouldn't stick to the mesh and when the spine is animated it would detach.
So i used Maya hair :D. Maya hair works by having dynamic hair attached to the mesh with hair follicles; the follicles are a small node that sticks to a surface using its uv information. So i made one hair follicle, deleted the hair as i didn't need it and just parent constrained the power unit mesh to the follicle. This way it follows along with the mesh perfectly with no deformation even-though the chest is deforming :D.
Road Runner 3D: Coyote Falls
Superb animated short "Coyote Falls". I saw this a few months ago as the intro to the film "Cats and dogs 2". At first I thought "oh god they've jumped on the 3D bandwagon" not knocking 3D but I just think some classic 2D cartoons should stay in that medium. However after watching it I was surprised as to how well they have kept it to the original and this opens up a whole new area of 3D where more cartoon style over the top deformation is possible. In the past its been hard to get this sort of cartoon animation due to restriction in rigging, If you want a 2d character to stretch and grow multiple arms at the same time you just need to draw them but in 3D you need the integrate them with the rig and the characters mesh and make them all work together. However in recent years we have seen more of this 3D over the top cartoon animation like Presto and Bob, Bob is literately a blob with 2 arms but the stuff he can achieve is awesome and fun to watch :). With the advances in 3D animation it seems this sort of rigging and dynamics is becoming more available so hopefully in the future we will see more of these amazing animations :D
Tuesday, 15 February 2011
What am i - WIP - 50

Finishing the blocking out the animation.
Just by adding a simple rig to the main camera has helped a whole lot with the camera animation, trying to get nice arcs between shots can be hard when animating from one pivot point. In this shot the 1st camera arm lifts the camera up, the camera handle rotates to track the robot, then the main controls is slowly moving along the floor which has given quite a nice camera movement :).
The actual camera for the rig is just numbs curves parented together to make something like an actual film camera tripod on a track.
Sunday, 13 February 2011
Thursday, 10 February 2011
Digital Tutors January winner

www.digitaltutors.com/forum/showthread.php?25301-Jan11-Contest-Winner!
So chuffed that my entry won the January competition :D
Tuesday, 8 February 2011
What am i - WIP - 49
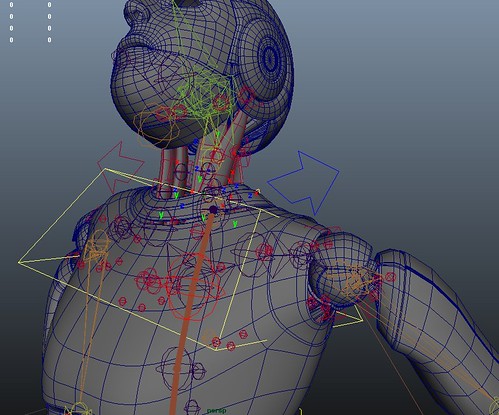
Rigging is a different type of art.
Im using referencing so im able to animate and update the rig as i please in a different file :).
It was hard to skin at first as the separate polygon object have to have seamless paint weights where they meet, otherwise they would separate when animates giving gaps.
Ive also been using Muscles but for the most par ive been sticking with the normal skinning. However for small parts that sit on the end of each muscles ive used the muscle skinning, this makes it easier for the smaller parts to follow along with the muscles instead of setting up a load of set driven keys and constraints.
The muscles on the neck were tricky as you cannot use muscle weights and skinning weight together, you have to convert to one. the problem was that the chest using a joint based spine so it must be skinned to joints, so to get around this i attached some joints to the muscles and have them skinned to the chest as well. This way the muscle drive some joints that drive the mesh so avoiding muscle weights :D
There are quite a lot of joints in the shot above but not all of them are used for skinning. Things like the spine has a set of driver joints, these are joints that drive other things to make the rig work but shouldn't be used to skin with.
Sunday, 6 February 2011
blend test
Just a HD blend-test for showing some models in wire-frame. might include this as a turntable render for my show-reel.
Saturday, 5 February 2011
Cheers for the comments
When posting work and tutorials on here and you-tube it often feels like throwing a pebble into the ocean and not really making much of an impact. However for checking my Google mail (which I don't check often) iv just found some nice feedback from people who read this blog and watch my tutorials. Cheers for the feedback im glad I can help and im happy you take the time to read and watch my videos, ill try make some more soon :)
Dean's complete rig
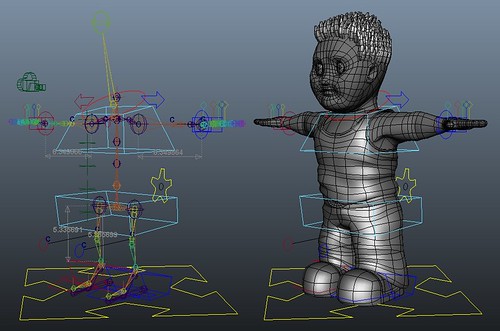
Character by Ilze Kolosovska, I'm just doing the rigging :)
This is the final rig for Dean. He was a bit awkward as his limbs are small and chubby so it was essential where the joint were placed on his legs and arms.
The rigs main functions include IK to FK arms, stretchy arms and legs and a stretchy n-spine. The screen shot on the left shows the entire rig with all its components (no including node based systems) and the shot to the right shows what the animator will actually see so the rest is there just hidden working behind the scenes.
Subscribe to:
Posts (Atom)